How to Lay Porcelain Slabs: A Step-by-step Guide
Porcelain Slabs have been trending for patios, gardens, and indoor flooring due to their high durability, amazing versatility in design, and low maintenance needs. It is now considered one of the most popular choices among homeowners and designers. They are effortlessly aesthetic and elegant, and can easily mimic the style of marble and wood.
With so many benefits, porcelain slabs are largely chosen for both indoor and outdoor designs. But laying them can be a daunting task. Especially when you’ve decided to go with the DIY route.
But we are here for you with a know-how guide on how to lay porcelain slabs! Where you’ll learn about tools, techniques, and steps for installing porcelain tiles.
Porcelain Slabs: A Perfect Choice For Your Home
Porcelain is a ceramic tile made from clay, silica, and feldspar. It is heated at a high temperature, which results in a highly dense and thick surface of the stone. In the last few years, they have been taking centre stage for their natural designs. These elegant tiles are ultra-durable, sleek, slip-resistant, stain-resistant, and much more.
Let us take a look at some of the major exceptional perks of installing a porcelain tile:
a. Superior Resistance to Moisture, Stains, And Scratches
One of the most amazing features of porcelain, like Raj green tiles and others, is its exceptional water resistance, so you can walk freely around the poolside and bathroom! The tiles remain naturally unaffected by scratches and stains to protect the natural texture.
b. Super Easy to Clean And Maintain
Porcelain has always been a front-foot player when it comes to effortless cleaning and maintenance. Unlike other stones like cobblestone paving and wall cladding, which may need extra attention to be cared for. It naturally remains mostly unaffected by stains and bacteria, making it easy to maintain.
c. Exceptionally Durable
The most amazing benefit of porcelain is its exceptional Durability. Due to its dense composition and intense heating process, porcelain resists everyday wear and tear. Porcelain slabs are an excellent choice for countertops and outdoor areas.
d. Versatile Range of Colors, Tones, and Textures
Unlike other natural stones with limited choices in colours and textures, porcelain slabs come with a wide range of colours, tones, and textures. The versatility of this stone allows homeowners and designers to create something unique for each project.
Tools And Materials You Need

It’s good to prep and collect all the tools and materials you’ll need before learning about how to lay porcelain paving slabs. Here’s a list of suggested tools and materials for laying natural stones like porcelain slabs and tiles:
Tools:
Wheelbarrow: For taking the material from one place to another.
A measuring Tape: For measuring the accurate size during installation.
Wet Saw with Diamond Blade: For cutting the tiles and slabs into different shapes or for accurate sizing of natural stone.
Personal Protective Equipment: Wear protective gloves, goggles, and earplugs to prevent any injury.
Cement Mixer: For mixing the cement.
Plate Compactor: To stabilise the bedding material used for various stones like porcelain, Indian sandstone, and granite.
Materials:
Porcelain Slab: Choose a pattern and set of tiles that you want to install.
A base: Bring a base for creating a sturdy foundation for tiles.
Cement and Sand: For a complete base with sand in the ratio 1:4.
Slurry Prime: An essential adhesive to help bond the non-porous slabs.
Mortar: To secure the slabs in one place.
Joining Compound: To use between the slab.
Drainage solution: Find a drainage solution for removing the surface water.
How to lay Porcelain Slabs: Step-by-step Process
Do you want to learn how to lay porcelain paving slabs like a pro? Installing this stone carefully and properly may require following the proper steps and guidelines for long-term benefits.
Here is the step-by-step process that will help install porcelain slabs:
Step 1: Plan the layout
Before you start installing the tile, plan and prepare the space where you want to install the tile. Measure and mark the area accurately with wooden pegs for proper installation. Natural stones like black limestone tiles and granite slabs also have the same first step before laying out the tiles.
Step 2: Start digging (For Garden Patio)
If you are installing the porcelain stone in the garden, then you need to dig the area properly. Mark the area with string lines and ensure to dig the surface at least 160 mm, which is divided into 40 mm of bedding mortar, 100 mm of compacted type MOT or even sub-base material, and 20mm thickness for slabs.
Step 3: Prepare And Lay the Sub-Base
A strong sub-base is essential to having a long-lasting and durable garden and path. When learning how to lay porcelain paving slabs, this step is one of the most crucial ones. Now that you’ve dug the area, lay a compact base down to 100mm with MOT Type 1.
Step 4: Next, Prime The Porcelain Tile
After prepping a strong foundation, the next crucial step in how to lay porcelain tiles is applying a primer. Use a masonry brush for applying a primer coating to the slabs. This will create strong adhesion and create a strong surface for a long time.
Step 5: Now, layer with a mortar bed
Create a mortar bed by using a mechanical mixer. Mix four parts of sand and 1 part of cement (ratio of 4:1). Then, use a trowel to layer the surface with the mix. Now, apply the mixture for one slab at a time and repeat the process for each slab. Mortar beds are used for any natural stone, be it porcelain, limestone, indian sandstone, or granite.
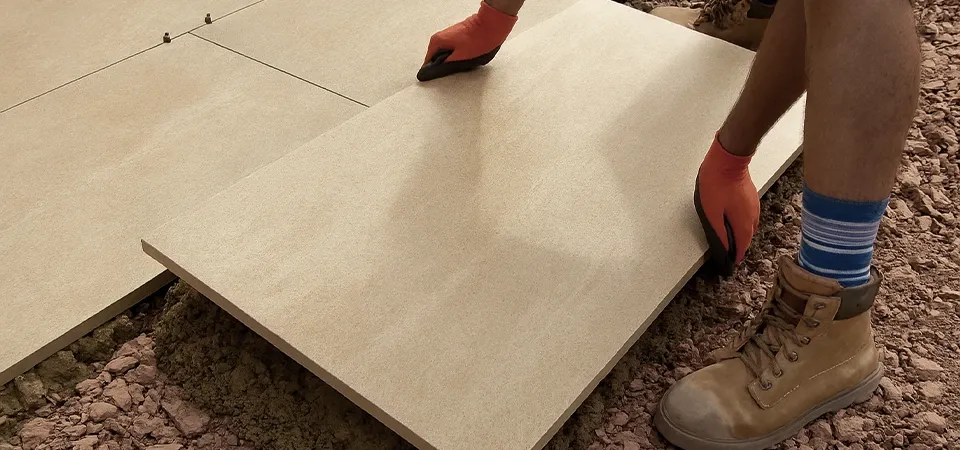
Step 6: Start by laying the tile
While laying the mortar bed, you can start laying the porcelain slab and leave space for a joining agent. Ensure you clean the face of your paving slabs thoroughly so that no primer is applied by mistake. Additionally, check the height and size of tiles for proper installation.
Step 7: Grout the tiles
This is one of the last steps in learning how to lay porcelain slabs. Now, you need to fill the joints with grout.
Step 8: Give the finishing Touch
The Last step is to clean the porcelain slab surfaces. You could use power washing, but ensure you do not use so much pressure. Other than that, now you can see the beauty of your finishes for years to come!
Conclusion
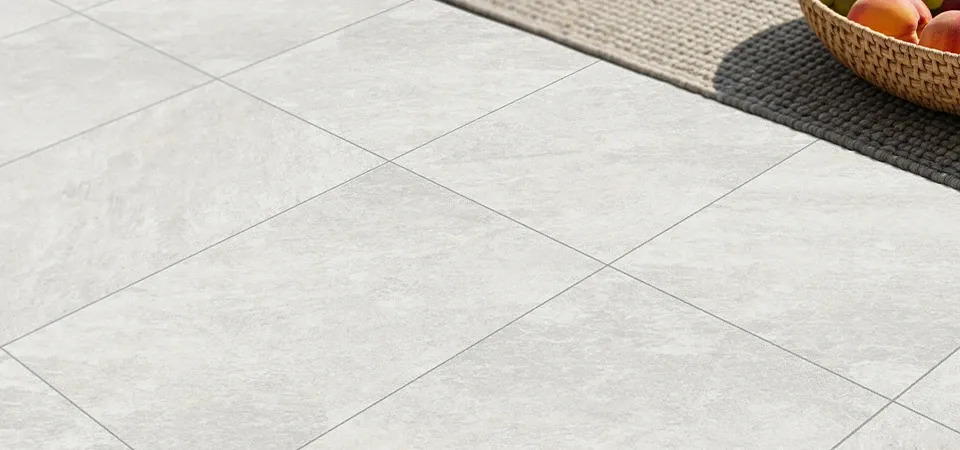
Porcelain slabs can transform your entire area for a patio, garden, or walkway and give it sleek and durable products for all spaces. This can last for a long time if maintained properly. It is important to know the process, but knowing how much to lay porcelain slabs will help you execute your project better.
You may do it yourself or hire a professional. If you prepare, use the right equipment, and run the right technique, the right porcelain paving can be beautiful and functional for decades.
FAQ’s: How to Lay Porcelain Slabs
Q1. What is the ideal base to lay porcelain slabs on?
Ans. A solid mortar base is the best for natural stones, like porcelain slabs, limestone tiles, and more. It is one of the most crucial steps when learning how to lay porcelain slabs.
Q2. Do porcelain slabs require a strong concrete base?
Ans. Yes, porcelain slabs require a concrete base of sand and cement mixture. This mixture offers a strong and durable base.
Q3. Can you directly lay the porcelain tile?
Ans. Yes, you can directly lay the porcelain tile, but strong concrete makes the space stronger and more durable.
Q4. Can you install porcelain slabs without primer?
Ans. All types of natural slabs, stones, and cobblestone paving need a primer for better installation. You must always use a paving primer before laying impermeable pavers. They will not bond to the bedding mortar without it.