Step-by-Step guide on how to lay patio slabs in 2026
Thinking about revamping your garden by installing a sustainable yet gorgeous patio? Look no further, as you’ve landed at the right place. But many ask, how to lay patio slabs, and what are the steps to creating a beautiful garden patio?
For a polished and timeless finish, knowing how to lay a garden patio slab is an important step.
Whether you are thinking about revamping your whole garden or creating a patio with slate stones or porcelain planks, these are some of the few choices available in 2026.
In this guide, we’ll give you a professional step-by-step process on how to lay a patio slab in a garden.
What Tools Do You Need To Lay a Patio?
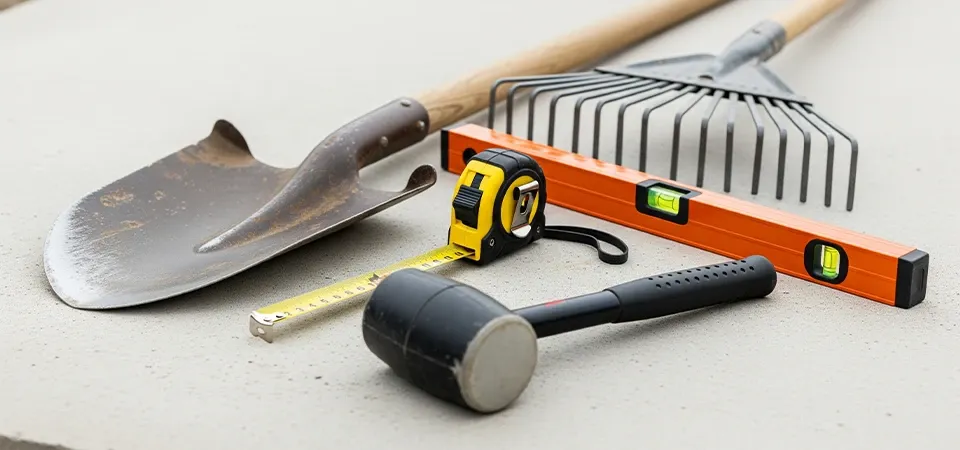
When mastering the art of how to lay patio paving slabs like rustic slate stone, yellow sandstone, and more, you need some crucial tools. Tools that will help you create a perfect patio without investing too much time. The tools that you may need for creating a beautiful garden patio are as follows:
A shovel
A string and stakes for marking the area
A rubber mallet
A spirit level
Protective clothing, including knee pads and thick gloves
A tape measure
A rake
A tamper
A jointing tool
Safety Measures:
Learn the technique to lift the patio slabs, or partner with another person, as patio slabs can be heavy.
Wear suitable footwear and gloves to prevent any cuts or injury while working with slabs, cement, or sand.
Wear ear protection and boots if you are working with wacker plates.
Always wear a dust mask and goggles when working with mortar mix, cement, or slab layer.
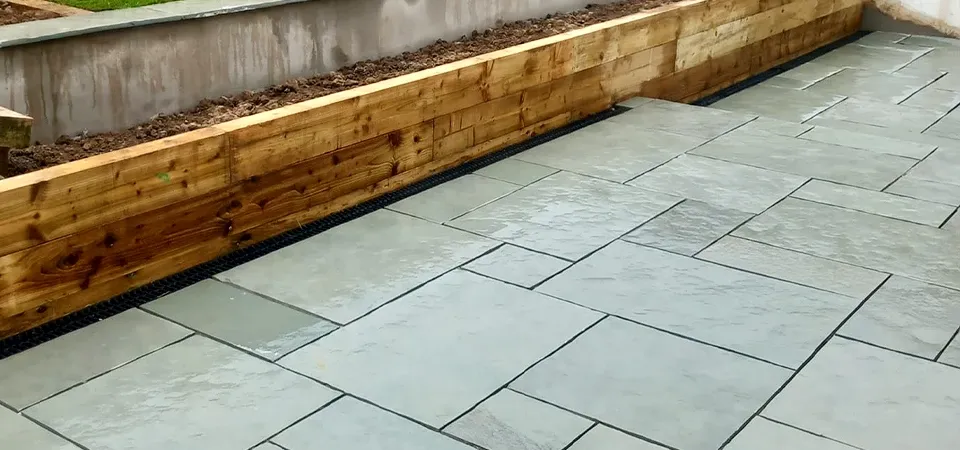
How to Lay Patio Paving Slabs: Step-by-Step

Want a garden that turns every eye and compels people to ask you the secret behind the perfect garden with a beautiful patio. Patio Slabs, such as kandla grey cobblestone paving, are one of the most opted choices for creating a beautiful seating area in the backyards and garden. Below are the steps for how to lay garden patio slabs:
Step 1: Select the Right Slabs for Patio
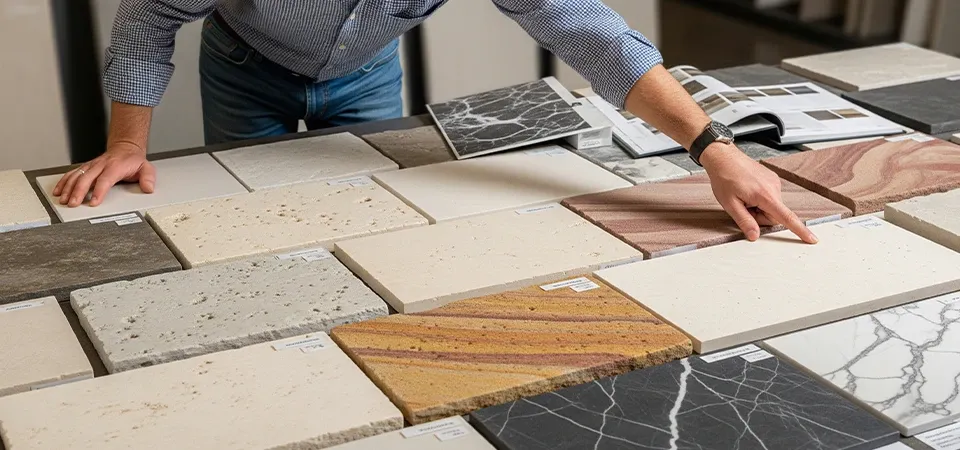
Selecting the right slab for your garden patio can be one of those make-or-break points. Select a durable slab, easy to upkeep, and that matches your design ideas for the garden patio.
In 2026, these are some of the renowned stones in the industry:
Slab pavers, such as Antique yellow limestone paving and others, have been a famous name for modern and contemporary garden patio design. Also, they are available in many colors and textures.
Large Format Porcelain: Large-format porcelain slabs are trending for their ability to create sleek, coherent patios with fewer joints and a seamless indoor and outdoor flow. The clean lines enhance modern architectural layouts and are low-maintenance.
Concrete Designs: Concretes are creating hype for being imperfect yet effortlessly beautiful as a sustainable patio that can last for years.
Indian Sandstones like Sagar black tumble paving and others have remained a popular option for slabs for garden patio designs that feel both sophisticated and earthy because of their warm tones and distinctive textures.
Step 2: Plan and Measure the Area for Installing Slabs
Measure: Start by measuring and marking the dimensions of patios for installation. You can confirm the correct measurements by placing all the slabs on the ground. Ensure leave joint space between each of the slabs. Then, all you need to do is mark the areas by driving wooden pegs into the ground.
Step 3: Start Digging the Area
Once the area has been determined, you can dig the area. First, you need to determine how deep it needs to be. You will typically have to dig around 150mm at the highest point. This takes into account 100mm for the sub-base and 40-50mm for the mortar, but you will then need to consider if you would like your paving to sit at ground level or raised, and add that to the depth.
Now, dig down with a spade at the exact depth you require and then tie the string to the pegs at the desired level for the paving slab to sit at.
Step 4: Lay Your Sub-base
Next, you must lay your sub-base. This is a layer or layers of crushed stone or concrete, as designated. When you lay your sub-base, you must remember to take your calculated fall (depending on whether you chose a 12.5mm or 16mm drop per metre) also into consideration.
It should slope gradually down toward either your lawn or drainage system. At this point, you will want to ensure that this is compacted and level, using a powered compactor, and depending on the power of the machine, use a good pair of earplugs!
Step 5: Next, add a layer of Morter
Adding a layer of mortar is one of the most crucial steps when learning how to lay a slab patio. Mix sand with a cement mixer in a 4:1 ratio( 4 parts of sharp sand and one part of cement). Then add some water, and mix it with the mortar. At last, you can use a trowel to apply above the sub-base level at 40-50mm.
Step 6: Start laying the Slabs
Once you’ve laid the mortar and levelled properly, start laying the slabs. One thing to keep in mind is that you need to leave a gap of 10mm for each slab. Ensure all the slabs are leveled evenly.
Step 7: Lastly, Apply the Jointing Compound
After 24 hours of laying the slabs and filling in the gaps with jointing compound between your slabs, these need to be filled into each gap. Now, all the work is done, and you can set up the patio within 2 days.
Takeaways
After completing all the steps of learning how to lay patio slabs, decide if you are ready to take on a DIY project. But remember always to be cautious and follow all the safety guidelines and instructions in this guide and on the tools.
Choose from our amazing collection of natural stone tiles like limestone paving, slate stones, granite slabs, and more for your garden project. We offer an amazing range of patio and outdoor paving to suit every garden’s aesthetics.
FAQ’s: How to Lay Patio Slabs
Q1.What should be the gap between the slabs?
Ans. The gap between the slabs should be from 5 to 15mm between each slab, for better drainage. Always consult the manufacturer’s guidelines for your specific paving product.
Q2. How long should you leave the slab before you can start walking on it?
Ans. You can walk on newly laid paving slabs after 24 to 48 hours, but you must allow the mortar or cement to dry and set first to prevent shifting, misalignment, or damage to the slabs.
Q3. Can you directly lay Slabs?
Ans. No, you cannot directly lay slabs. It lacks stability and is prone to erosion, shifting, and sinking, leading to an uneven and unstable surface over time
Q4. What is a suitable mix for laying a patio?
Ans. Give slabs a layer of MOT Type 1 or crushed stone (hardcore) as a sub-base, which should then be compacted with a plate compactor.
Q5. Should you be putting a membrane under the slabs?
Ans. Yes, you can put a non-woven membrane under a patio’s sub-base, though it cannot prevent weeds.